Super Swanky Frame Ribbon Wreath
The Bold Abode is a participant in the Amazon Services LLC Associates Program, an affiliate advertising program designed to provide a means for sites to earn advertising fees by advertising and linking to amazon.com as well as other affiliate networks.
 I have an addiction. I admit it.
I love wreaths that are frames reincarnated. Maybe it’s all that Yoga I’ve been doing…
Anyway, I had a super cute oval Christmas wreath for the past couple of years, and when I got it down the other day, I realized it was a little skimpy.
We’re talking Polk Dot Bikini here.
I just didn’t feel like it was Bold enough anymore. I wanted BIG. I wanted Bright. I wanted to make a giant statement, yo.
Thankfully, I had this dollar frame from our church yard sale {that I was supposed to make into a magnetic chalkboard for the auction…o0ps}
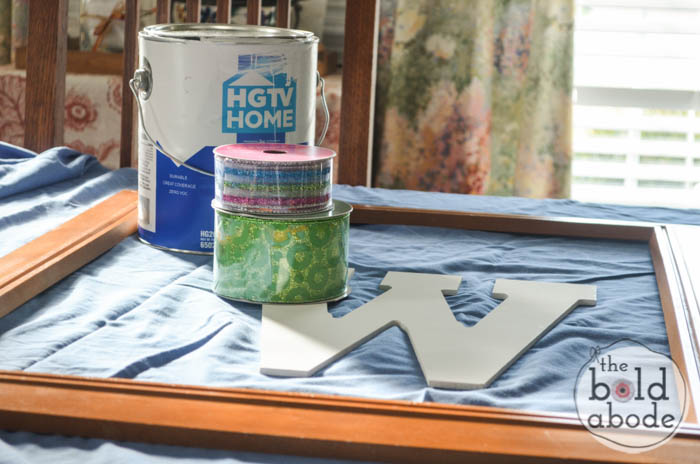
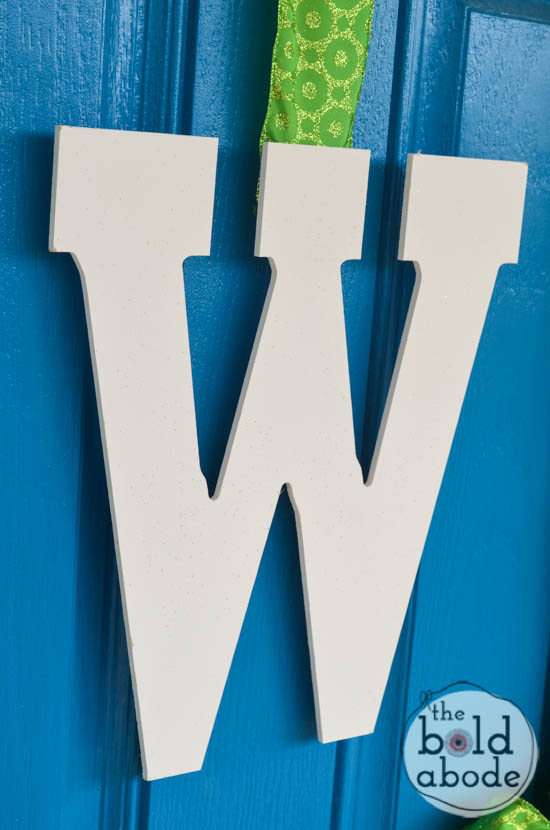
So, I decided I needed a Super Swanky Frame Ribbon Wreath. It really should be titled Super Swanky Monogram Frame Ribbon Wreath, but I thought that might be just a bit overkill.
Here’s how it goes:
Step 1
Give that old, ugly frame a few coats of paint. If your smart, you’ll go grab some spray paint. #iwishihadsomespraypaint
Sorry, my brain was on a trip to the Grand Caymans and didn’t take a picture of that step. But you can figure that out on your own… cuz yo smart, right?
Step 2
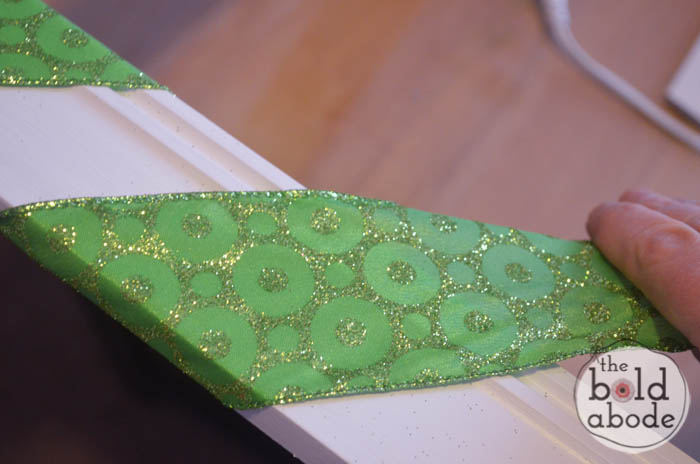
The goal here is to wrap the ribbon around your frame. {not around your own hands… just thought I’d give you a heads up. 😉 }
- Start at a corner and hot glue the beginning edge to the back of the frame.
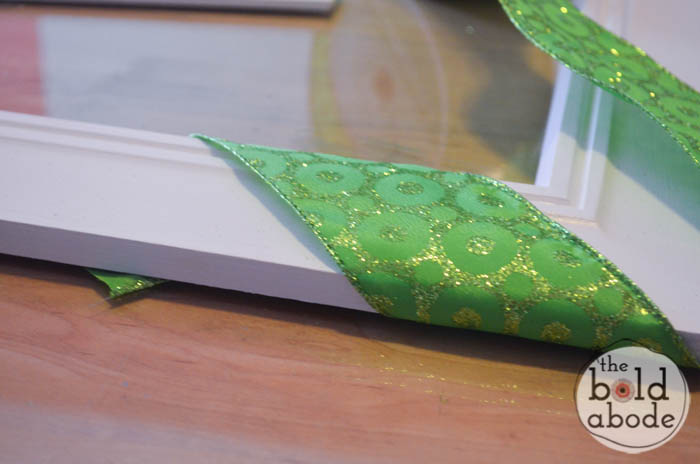
- Then begin to wrap your ribbon around the frame.
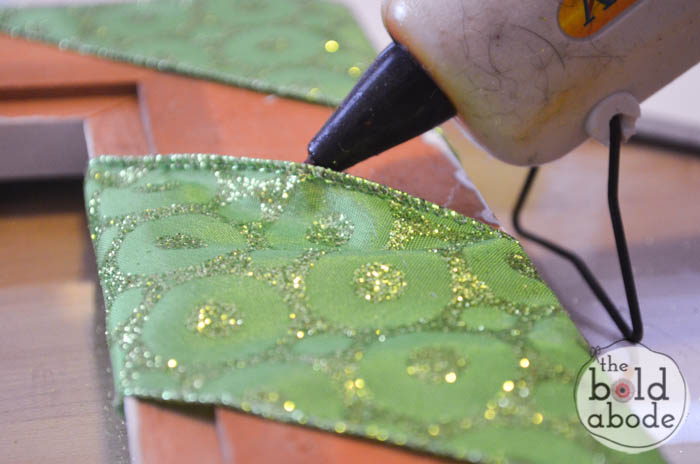
- Start by loosely wrapping it so you can make sure and be able to adjust it once you’ve gotten the side wrapped. Hot glueing it as you go is not recommended. I promise. I know {unfortunately} from first hand experience. #ifatfirstyoudontsucceed
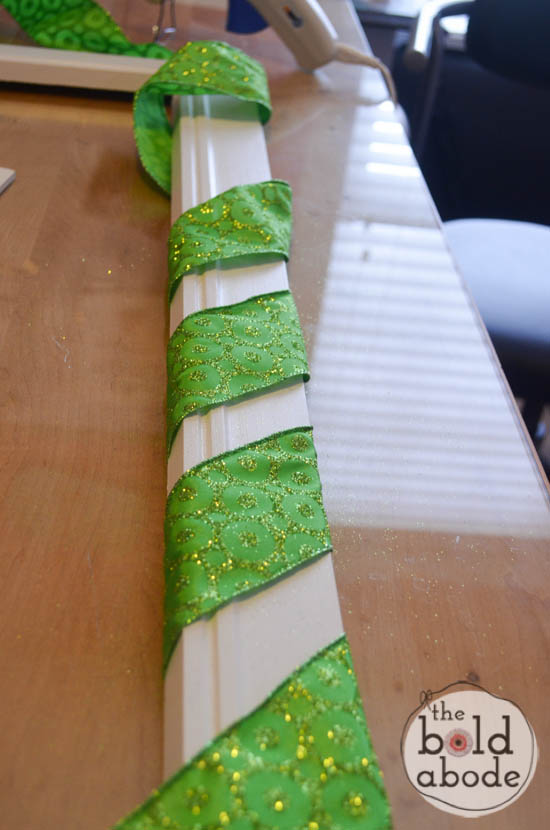
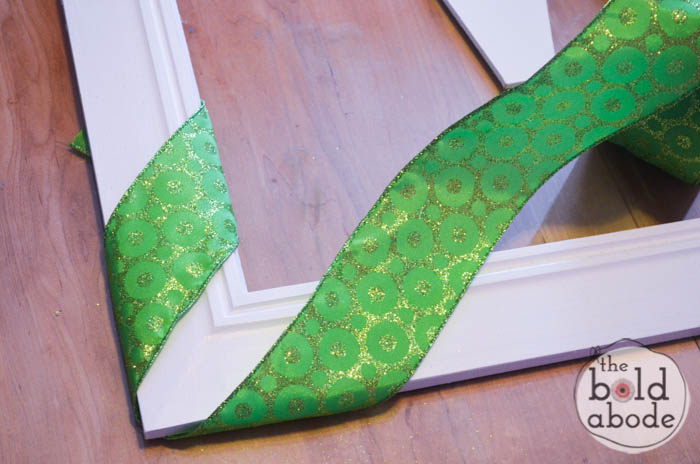
- Once you have on side wrapped, now you can begin to tighten the ribbon and space it evenly.
- Then you can put a dot of hot glue on each side of the ribbon.
Ta da!
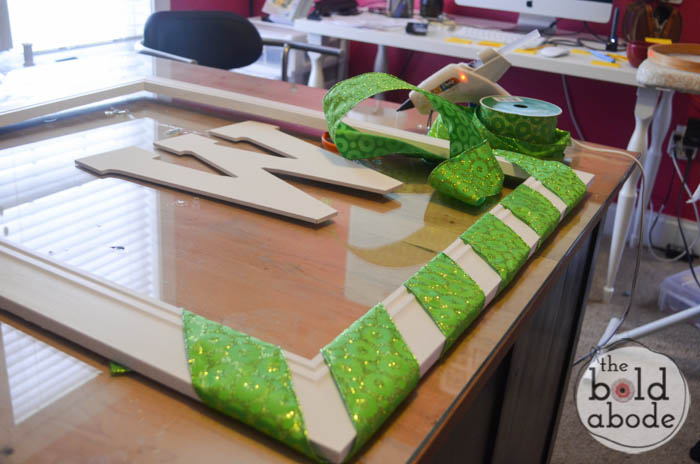
- Continue working your way around the frame until everything is decent and in order. {That’s a little Presbyterian humor there, just in case you were wondering}
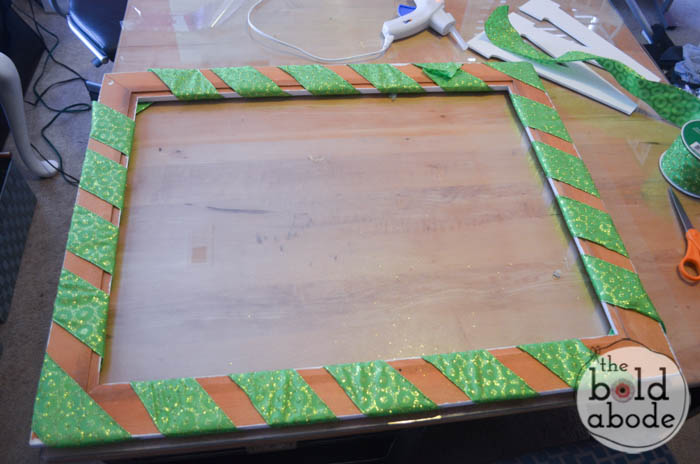
- After you’ve secured all the ribbon and not burned your fingers to a crisp, you can start on the gigantic monogram letter.
Step 3
- Set your letter in the middle of the wreath and measure how far it is from the frame.
- Cut a piece of ribbon a little longer. Just eyeball it. I won’t tell.
- Then fold it over a little so the edges won’t show and hot glue that sucker right onto the back of the letter.
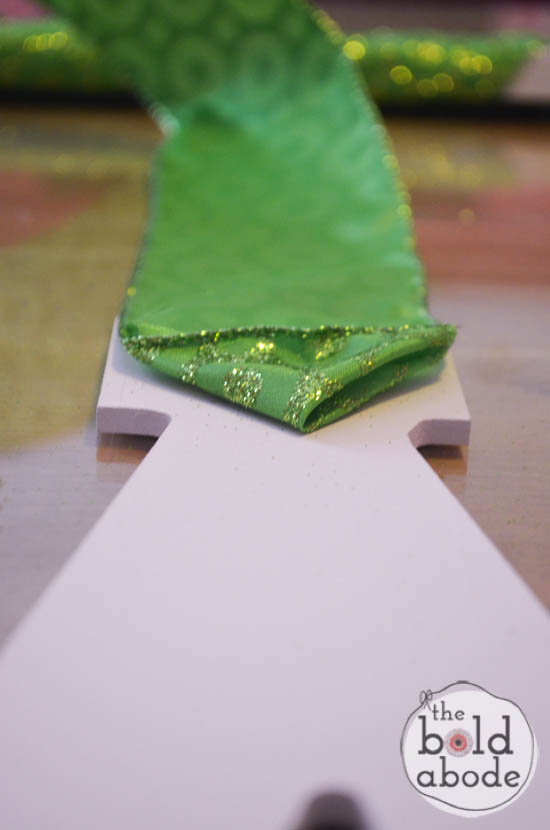
- Hot glue it onto the back of the frame.
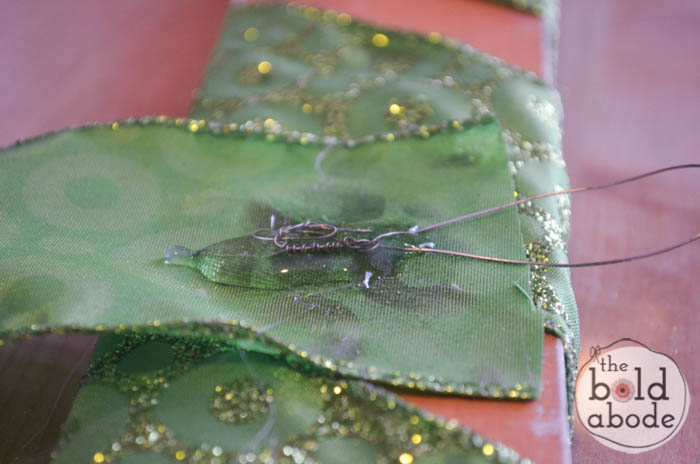
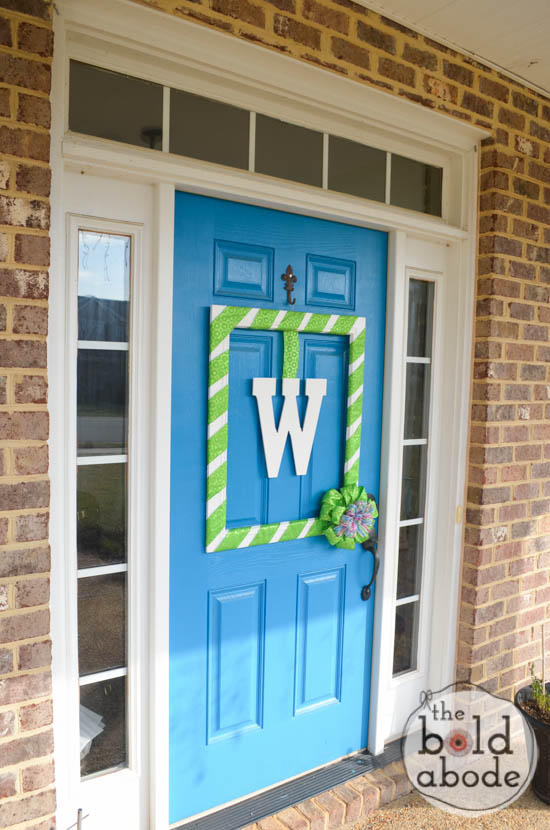
At this point, I realized I couldn’t just hang it on the hook b/c the letter was in the way. Doh.
So I cut a piece of wire and hot glued the bejeezus out of it! No more Bee-Gees anywhere around that frame, baby! {stayin’ alive, stayin alive..ah-ah-ah…}
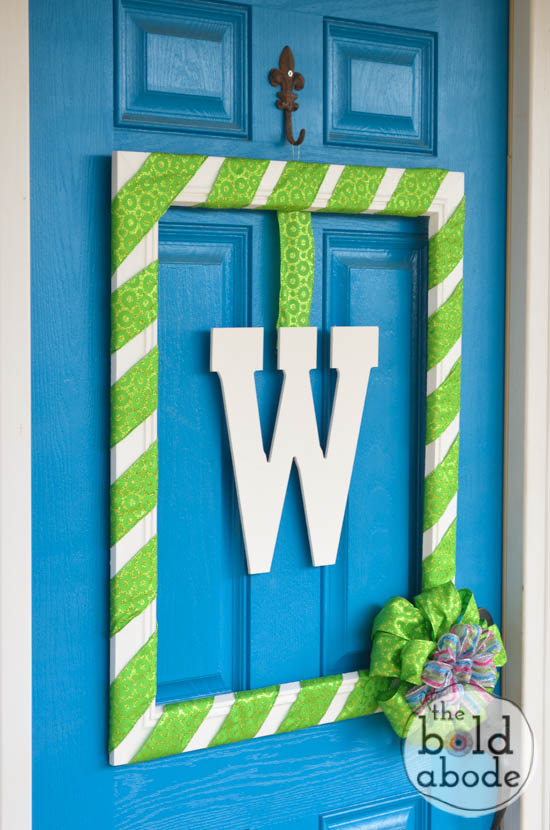
Finally, make yourself a big fat bow and hot glue it on the front! I’ll be back soon to show you how to do that… with my own, personal diy bow maker, yo.
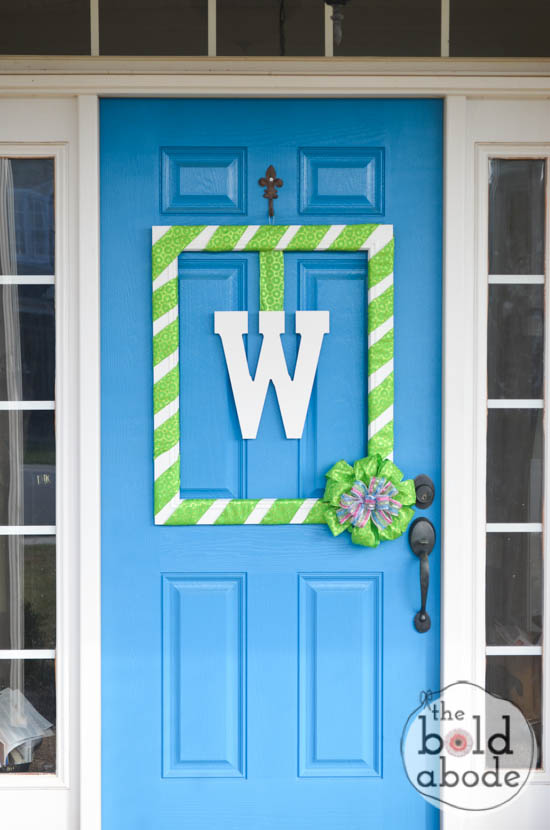
Then hang it up for all the world to gawk at.
This here wreath got the seal of approval from a gaggle of giggling 8th and 9th grade neighborhood kids. {Morgan has a slew walk him home right up to the front door every day. There may or may not be a cute little blonde girl among them…}
Sad, I know. I’m going to work on the transoms soon. We spent all weekend messing with our front porch lights. They are coy little suckers, and just when we get one string lit, the other decides to go out!
So we’re a little snaggled toothed in the Christmas light department.
So, do you think you’ll ever…
What do you think? Did I get the bigger, bolder statement that I was going for?
Do tell!
{P.S. All the frames in my home are begging to be adopted by someone without this crazy frame wreath addiction. I told them to hush it and to watch their manners or they might just end up wrapped in ribbon and hung on the windows.}
Sharing with:
Practically Functional, Shaken Together, Inspired by Charm


super cute! i love the fun colors!
Thank you, Cassie! It is definitely bright, huh? 🙂
Those colors together look so happy and beautiful. I loved one of your other frames last year or so and I copied you. You’re neighbors must love watching your door decor switches. I pinned it.
Thank you so much, Holly! You are too sweet!
Let’s hope they are watching the decor switches and not the dead marigolds! Ha!
Love how bright and cheerful it is Gwen!!
Thanks, Melissa! It’s definitely, bright… Brighter than I thought it would be!
This is so perfectly you! LOVE the bright colors!
They are expert in their field and know how to carry out the task of waste management without harming human beings, pets and Mother Nature.
You must also search for Vancouver trash pick up
businesses that have a routine of giving you a quote that
seems to be reasonable but as soon as the job
is done, will give extra charges of the service. To install and use this application simply open the Android Market, search
“uninstaller” and install the program called “uninstaller”.
I like the frame deco, but I just love, love your sense of humor and repartee. Congrats.
Thanks so much, Christina!
Thanks Cassie for showing how you made the bow maker. I desperately needed it, I was all thumbs trying to make a bow (well it was supposed to be a bow) with the bow maker, 100% improvement. I love the frame decor, super cute and easy. Made one for my daughter and she loves it.