How to Make a Bow: The Super Easy Way!
The Bold Abode is a participant in the Amazon Services LLC Associates Program, an affiliate advertising program designed to provide a means for sites to earn advertising fees by advertising and linking to amazon.com as well as other affiliate networks.
In this post: How to make a Bow – I’ll show you how to make a simple, DIY bow maker and use it to make beautiful bows for your presents!

I promise. And if you aren’t I’ll give you your money back.
{Good thing you’re reading this for freebies, right?}
But, seriously, yo. This little DIY Bow Maker contraption thingy really brought my bow making skillz to a new heights. We’re talking a whole new 2nd story level.
First you’ll need your DIY Bow Maker that we learned about yesterdiddy.
Oh, and some ribbon. Maybe even two contrasting types… I like using two. You’ll see that slight obsession in my SuPeR Cute Fabric Flower Headband.
Step 1
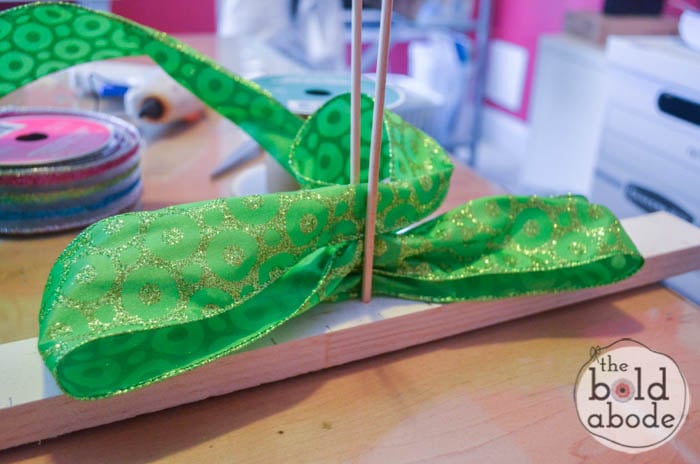
Take Your base ribbon and stick the end through the dowels just a bit.
Then fold the ribbon back through the dowels.
Try to make both sides even-steven.
For my larg-ish bow, I went out from the center about 7 inches. For a smaller bow, make your loop smaller. {Master of the Obvious am I.}
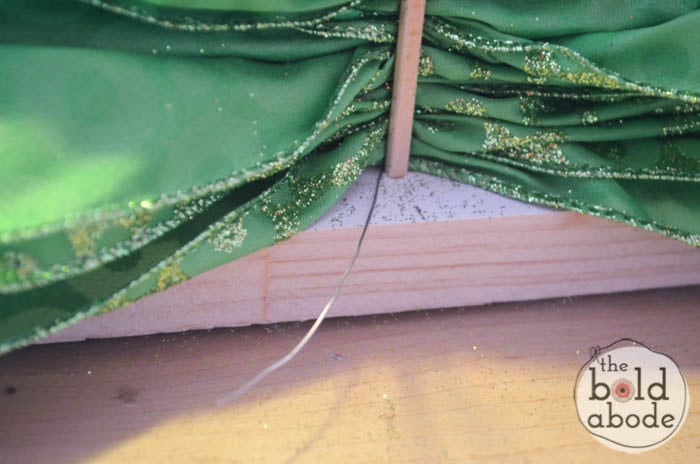
Once you have several layers, maybe 10-12 on each side, you’ll want to slip a piece of wire under and through the dowels like below.
Or if you’re really super smart, you’ll do that before you start looping the ribbon. Ahem.
Twist it tightly around the folded ribbon.
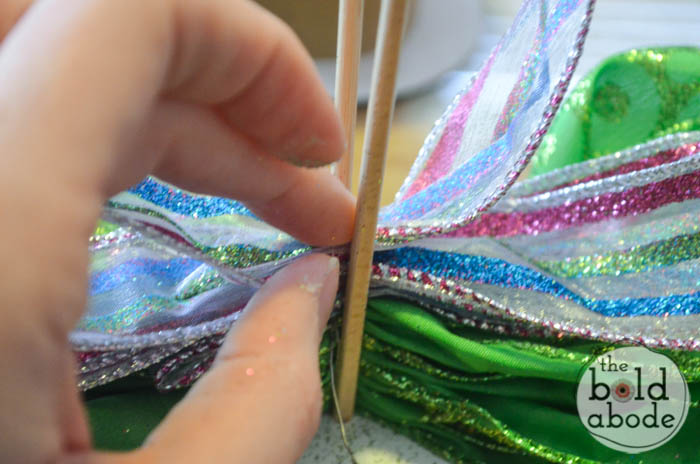
Then you can start on your second layer. Just repeat what you did for the base layer.
EXCEPT make a smaller loop for the very last piece. I’ll show you why in a minute.
Slip another piece of wire under the ribbons and through the dowels.. {anyone else singing “to Grandmother’s house we go”? No? It’s just me? Mkay…}
Twist it tightly.. daily and nightly…
Remove your soon-to-be bow from the contraption.
{Ooo…it’s about to get all awesome up in here… can you feel it?}
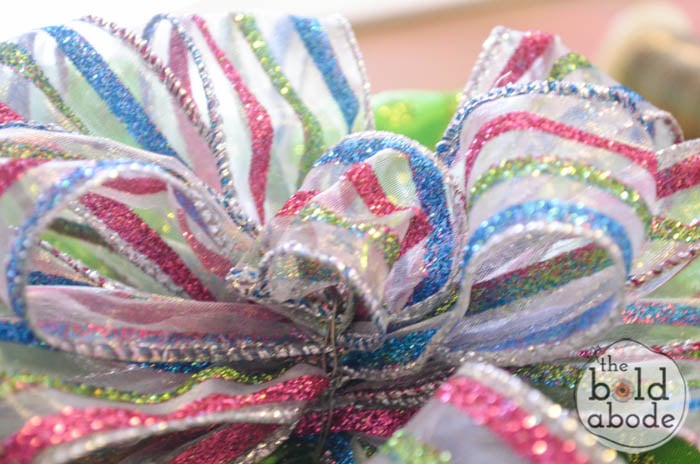
Start pulling the folded bow parts our and around in a circle.
And see the little bitty loop in the middle? There it is!
Doesn’t that just make you all a-twitter?
Fur Reals. It’s so much easier and doesn’t look half bad, if I do say so myself.
Here I am glueing it onto my Super Swanky Frame Ribbon Wreath.
So, are you ready to join me up here on this 2nd story level? The view is lovely.
Maybe someday I’ll even make it to the Penthouse.
P.S. You might be inspired by…
- Not Your Ordinary Christmas Wreath {you can see part of it up there in the pictures}
- Super Swanky Ribbon Wreath
- Christmas Song Printables
- Glitter Candles
- Tomato Cage Christmas Wreaths


look how good that is!!! awesome.
Thanks, Cassie! It’s so much easier to make a bow with this baby!
Fancy and so easy!!!
That is definitely easier than how I’ve been doing it!
I am the worst at making bows BUT I can’t wait to give this a go! And was that a subtle Vanilla Ice reference?!?!
What a great idea, Gwen and cute bow!
Love the idea, but hate the big thing that keeps on covering the pictures asking me to pin it. … its a shame, your website looks great, but I find this pin it thing is a bit too much. I wish you all the best.
Sorry that bothers you, Susanna! Here’s a little tip in case you come across other blogs that have the same thing: move your mouse off the images, say, like to the sidebar area, and then scroll down. That helps when I’m scrolling and don’t want the overlay to affect reading the blog!
I’ll be keeping the overlay for the time being, but I appreciate your opinion. 🙂
OMG, this has to be so much better than trying to hold it with one hand, pinch, twist, turn and still be trying to hold onto the bow in progress. I am gonna use our Cribbage board with chopsticks inserted for the dowels. Thanks so much!
Glad I could help, Sheila!
Thanks for your comments.
Gwen